Overview
Mount an encapsulated web component into your checkout, with optional Apple Pay and Google Pay.
The Payment SDK embeds a payment form into your checkout page. Load the JavaScript module and call ic.payment.v1.mount(...) to display the form with optional Apple Pay and Google Pay wallet buttons.
The form's styles are isolated from your page. Use the theme option to customize its appearance.
Apple Pay and Google Pay are only available for card-based sale transactions (POST /transactions/virtual-sale). Wallet buttons are not displayed for authorization, tokenization, or ACH sessions.
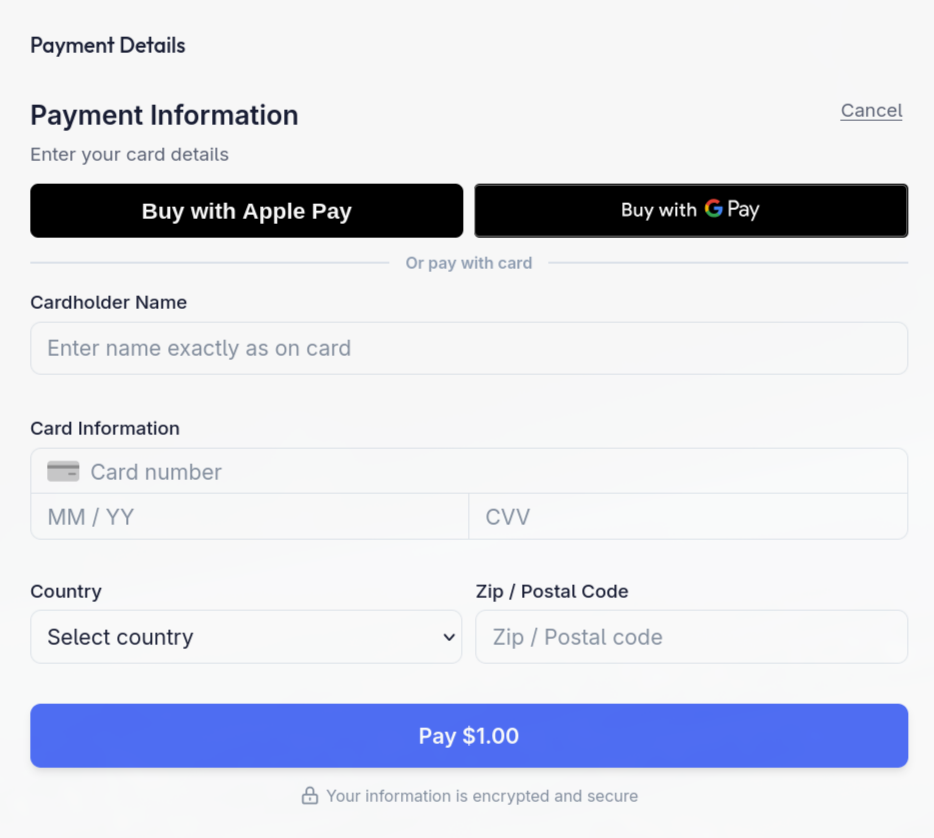
Eligible card-sale sessions offer wallet buttons alongside card entry.
Choosing between the SDK and the iframe
| Payment SDK | Hosted Payment Form | |
|---|---|---|
| Integration | Mount a web component | Embed an iframe URL |
| Apple Pay / Google Pay | Yes, on card sales | No |
| Result delivery | onComplete / onError callbacks |
Redirect, postMessage, or both |
| Styling | theme object |
Fixed |
Both are backed by the same endpoints and the same sessionId, so you can move between them without changing your backend.
Script endpoint
Load the SDK bundle on your checkout page:
<script type="module" src="https://cdn.omni.integratedcommerce.io/sdk/latest/ic-pay-sdk.js"></script>
Call ic.payment.v1.mount() after the module has loaded. Put your initialization in a module that imports the SDK, or wait for the script's load event.
Starting a session
To start a hosted payment session and receive the sessionId used by ic.payment.v1.mount(...), call one of:
| Endpoint | Purpose |
|---|---|
POST /transactions/virtual-sale |
Process a card-not-present sale |
POST /transactions/virtual-auth |
Authorize a card-not-present transaction |
POST /payment-methods/virtual |
Tokenize a card or ACH bank account |
Each response includes sessionId.
Create the session from your backend, never from the browser. Creating it client-side would require shipping your API key to the customer.
Minimal integration
const controller = ic.payment.v1.mount({
  sessionId: response.sessionId,
  container: "#payment-container", // CSS selector, element ID, or HTMLElement
  environment: "prod",
  onComplete: (transaction) => console.log("Payment complete", transaction),
  onError: (error) => console.error("Payment error", error),
});

// Keep the controller for the lifetime of this checkout.
// Call controller.unmount() from your route or component teardown handler.
The return value is a MountController with a single method:
unmount()- removes the form and wallet buttons and stops their event handling.
Call unmount() when the customer navigates away. In a single-page app, skipping it leaks event listeners and can leave a stale form mounted behind a route change.
ACH account holder selection
When you mount an ACH sale or tokenization session, the form shows a Personal Account / Business Account toggle. Personal Account is the default and collects first, optional middle, and last name. Business Account collects a single Business Name instead.
The toggle needs no additional SDK configuration. Both choices collect bank account details and full billing information. See Personal and business accounts for field requirements and how this choice relates to Checking or Savings.
Next steps
| Configuration | Public options for mount(). | Configuration |
| Theming | Match the form to your brand. | Theming |
| Callback payloads | What onComplete and onError receive. | Callback payloads |
| SDK error codes | The 6000-6999 range, by category. | SDK error codes |
Wallet buttons require domain validation before they will appear in production. See Apple Pay and Google Pay.